How to Display Your Portraits: Wall Prints

There is nothing that makes a home feel more complete than hanging the family portraits of the people you love on the wall. When you book your family, senior, maternity or engagement session, we’ll set a time to go over the most important aspects of your upcoming photo shoot so your pictures not only exceed your expectations but also are a perfect match for your home.

MATCHING DECOR

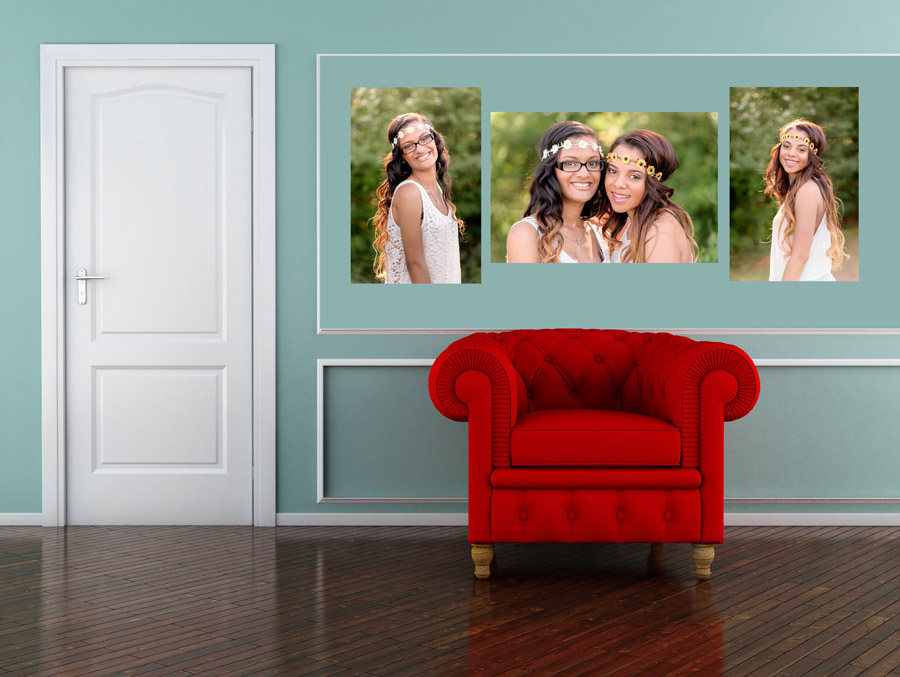
At your consultation, we’ll discuss your home decor so that the entire look of the final portrait that will be framed for the wall is a match. From the colour of your wardrobe to the style you choose – casual, formal or whimsical – we’ll talk details and find the best location in the Woodlands or Spring area to fit your vision, whether it’s earthy with natural colours or bright and colourful with a modern twist.

large-wall-art-the-woodlands

MEASUREMENTS

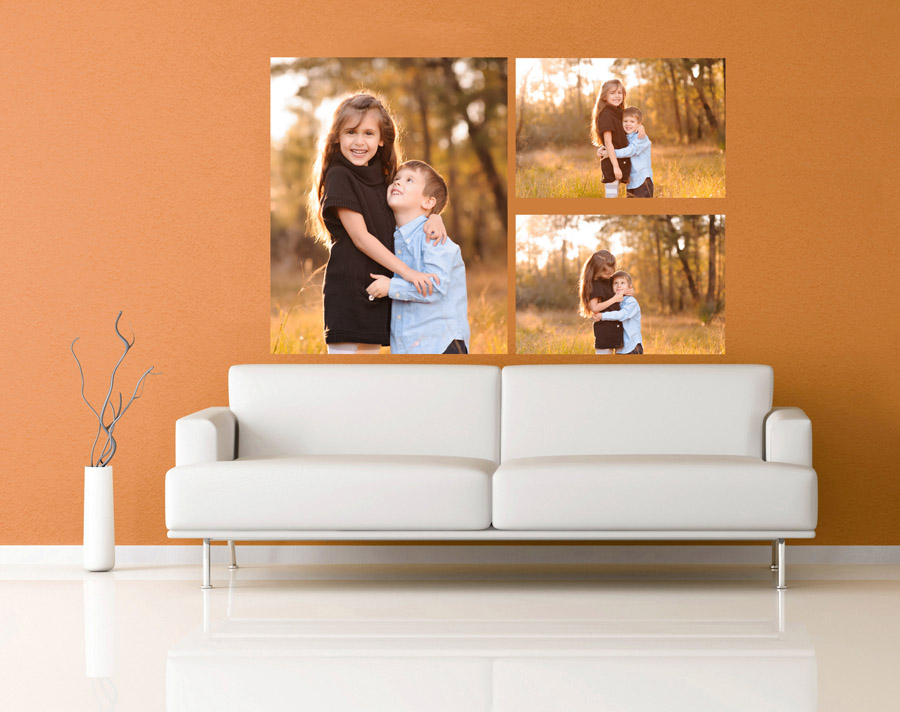
Before your in person viewing session, it’s a good idea to take measurements of the space where the portraits will go. In the home entrance, above the mantle in the living room, or in the master bedroom are popular places to hang the large family photo. After you’ve chosen your favourite image for display, I’ll show you how it will look in your chosen size. Different sizes can also change the shape, so an 16×24 will be a different shape (ie. longer or skinnier) than the more square shaped 30×40 because of the change in ratio. Remember – 8×10 prints are gift prints! That is not the size you want on your walls, that is the size of the photo you give to Grandma to frame for her mantle. Go big! Here is a little article I wrote on the difference between gift prints and wall art.

white sofa in a orange living-room

COLOUR OR BLACK AND WHITE

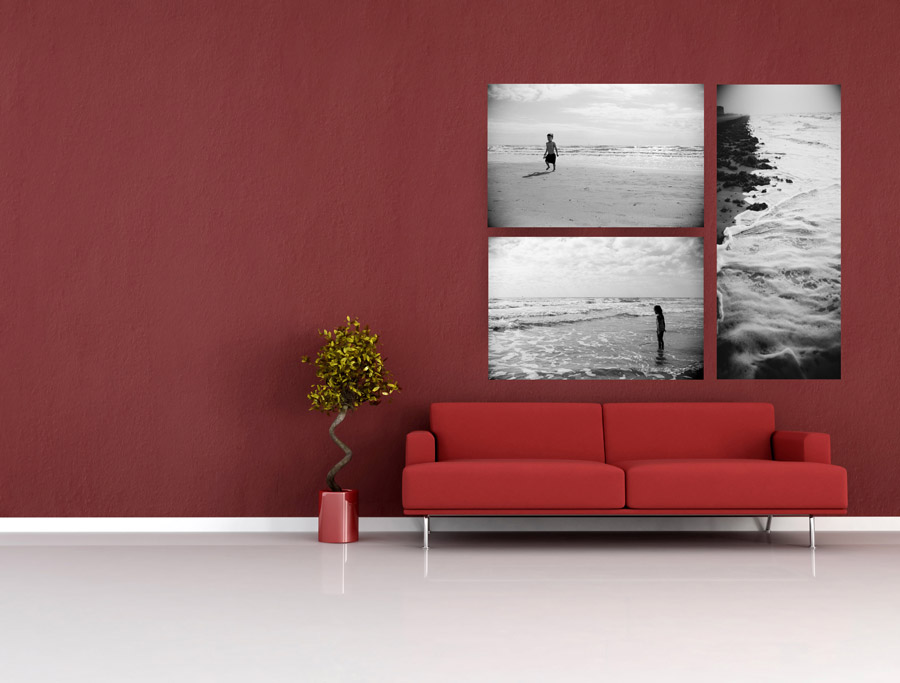
Along with your home decor, your personal preference for colour or black and white photos is also something to consider. I convert some of the pictures in your gallery to monochrome, when the light is right and the background isn’t too busy to  be a distraction. I personally love black and white photography, and most of the large prints I have of my own children and for my family album have been converted. When you purchase a digital file, if there is a black and white copy, you keep them both! So it you are printing, we’ll go over the two options to decide which version is right for you.

Red room

I look forward to helping you get the perfect piece of wall art for your home!

Senior Products – The Woodlands and Spring Senior Photographer

With the Senior Premium Collections, my high school senior portrait clients receive their entire gallery of gorgeous images, as a digital download with print release. I also include a print credit so you can choose from the a la carte menu which of the products suit you best and how you want to preserve, share and display all your favourite senior pictures.

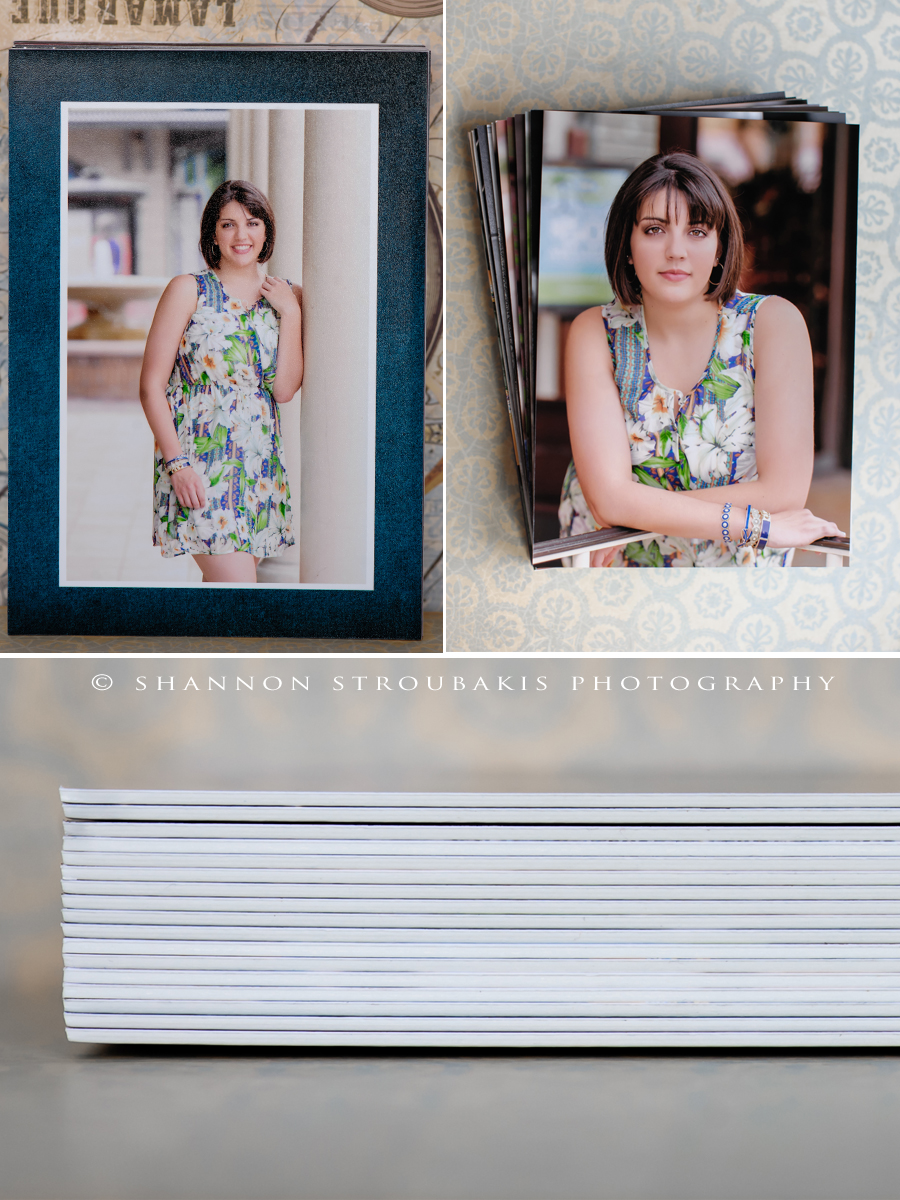
One of my absolute favourite products I offer is mounted prints. These take your average print to the next level, mounted on artboard for a polished presentation and durability.  When Elena’s order came in, with her big stack of mounted prints, I couldn’t help but snap a few photos of them in all their luxury. Take a peek!

On the left you’ll see one of the boutique designed mounted prints. She chose a deep earthy blue design for the framing. And on the right, the non-framed mounted prints. I offer these boutique prints, with or without a designed frame,  in sets of five on the a la carte menu in both 8×10 or 5×7 sizes.  When I see you for your consultation and viewing appointment, you’ll have a chance to see all these beautiful products in person! For more of the products you’ll take home, click here to visit my Products page. 

senior-products-the-woodlands

Digital Gallery: Care and Storage – Spring TX Portraits

We live in the digital age, and it makes sense that you want to have your favourite images from your senior, maternity, engagement or family portrait session kept safe and stored for future generations.   Now that you have your digital gallery, here are some important ways you can store and protect them.

how-to-store-digital-files-senior-photography

BACK UP TO AN EXTERNAL HARD DRIVE

As the long forgotten floppy disc taught us, formats change over the years. Some computers don’t even support DVDs anymore, so it’s important to move your digital files onto an external hard drive so they can be copied directly onto new technology.  These hard drives can be purchased anywhere and plug into your computer with a USB cord. Simply transfer the images with a simple copy and paste to the external hard drive for safekeeping.

BACK UP TO A USB

Small thumb drives should be large enough to hold your entire gallery, and are an economical way to back up your digital images. It’s always a good idea to have your images stored on several devices. You can even store one copy off site or in a fire proof box.

ON THE CLOUD

Putting your files and documents onto “the cloud” means that they are not stored on physical hardware but rather online through a host. There are several free options, but they offer limited storage space. Typically you would purchase a yearly subscription for the host to store your images. This is a great option, since they are safe in the event of physical damage to your DVD or external hard drive.

PRINT AND PRESERVE

While digital images are great for sharing and having a back up copy, I will always recommend printing your images so you have a lasting version of your favourite photos. These can be stored anywhere and put out for display to see every day.

DOUBLE UP

No matter how you choose to protect your precious photos, make sure to double up on the back ups. I use not one, not two, but THREE external hard drives to store my photos,  and back them up on the cloud as well.
I simply cannot risk them getting lost due to a technical glitch or corrupted drive. Happy storing!


Furbabies and the Family Photo – The Woodlands Photographer

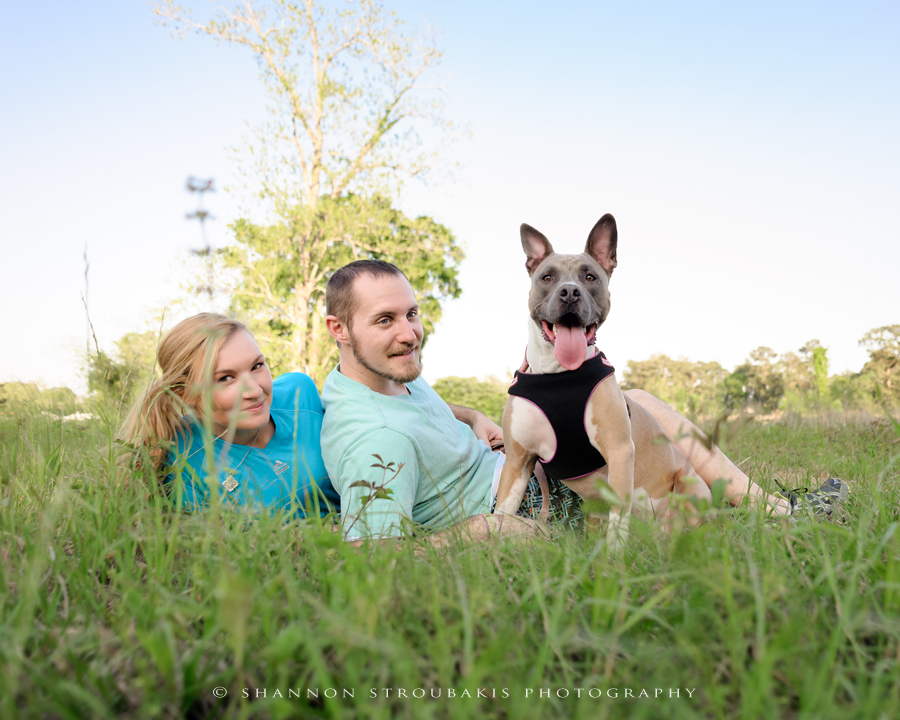
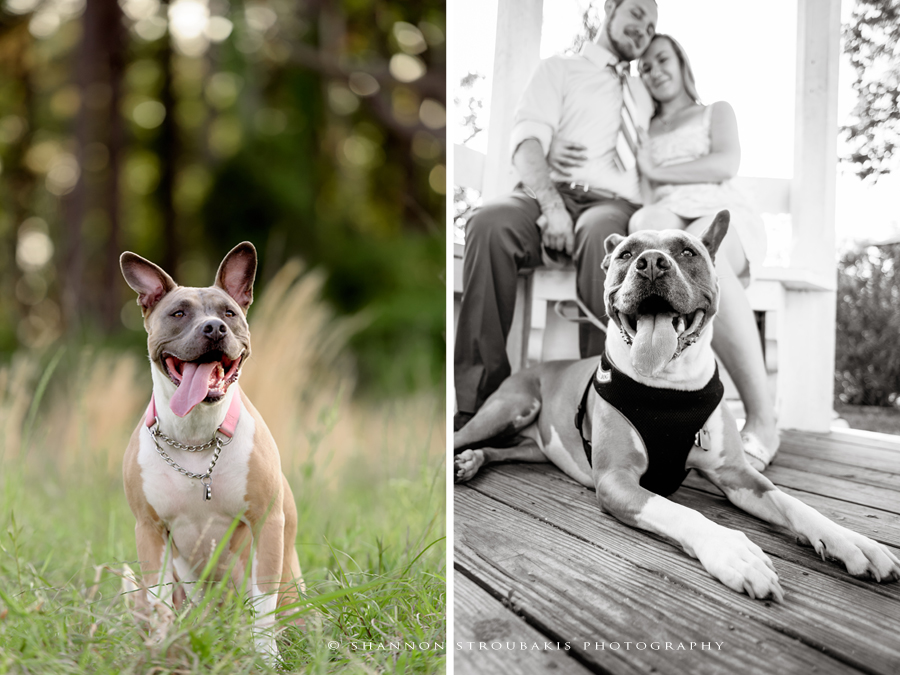
You’re preparing for your upcoming photography session with me here in the Woodlands and checking off all the little details as you go. Special outfits that coordinate with the location – check!  Shined your brand spankin’ new engagement bling – check!  Letterman jacket for senior portraits – check! Snacks for the dog – check…wait…the furbaby is coming? Hey, why not!  It’s possible to have a fabulous session that is fun AND relaxed but also still includes the furriest member of the family.

OUTDOOR-LIFESTYLE-PHOTOGRAPHY

Here’s the top five ways to make it a more enjoyable experience with Fido along:

1) Manage your expectations, according to your dog’s personality. If she’s really excitable and distracted in a natural environment (“Oh, look, squirrel!!!”) then it might not be reasonable to expect a perfect shot of her looking calmly into the lens. Remember, happy lifestyle shots of you playing  make wonderful keepsakes as well!

2) Let me know which “attention getters” if any will work.  Noise makers can get her attention or they can inspire her to lunge for a game of keep away.

3) Bring water and snacks for time outs.

4) Bring a leash. We will be shooting on location, and we want to keep her safe.

5) Go with the flow. If the posed shots with your pet aren’t working, know we’ll have to make the choice to embrace the less posed portraits, or let her be a spectator.

the-woodlands-family-photographer-pets


Top 10 Things to Bring to Your Senior Session

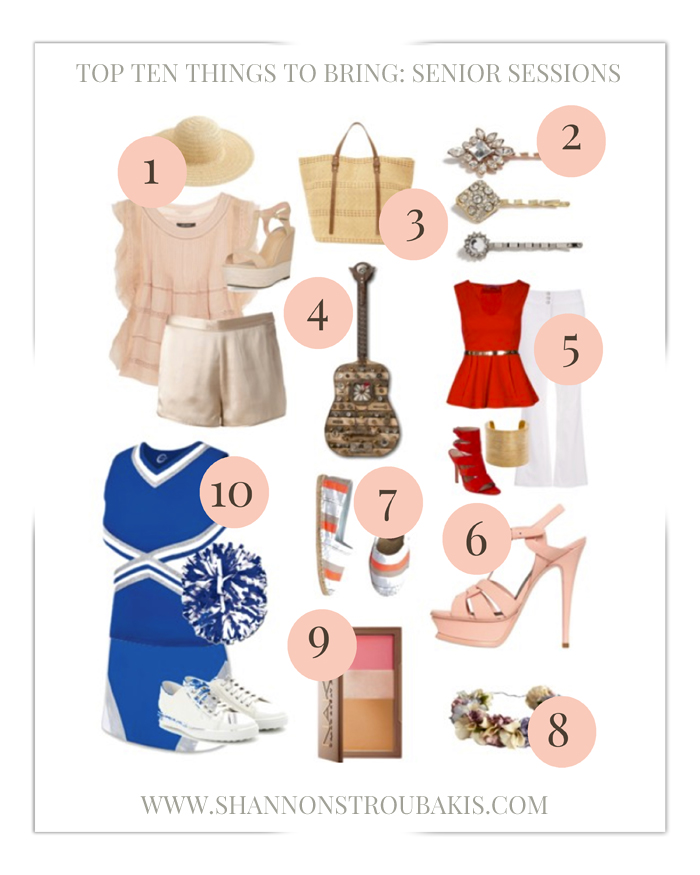
It’s Fashion Friday! If you’re planning your senior portrait session, here are the TOP TEN essentials you won’t want to forget for your photo shoot!

top ten things to bring to your senior session with fashion and make up tips

1) One casual outfit that reflects your own twist on the season’s hottest trends.
2) Extra hair clips to hold back strays.
3) A bag to stash your wallet, keys, cell phone and water while we walk around location.  Also works as a prop!
4) Something that helps tell the story of you. Are you a musician? A painter or writer?
5) A super glam outfit that shows your fierce and sassy side. Choose a vibrant colour.
6) High heels or wedges. These are very flattering for all body shapes and help straighten your posture when posing.
7) Flats for walking around location. You’ll be glad two hours into the shoot when we’re strolling through a field!
8) All your favourite accessories, whether girly and glittery, soft and boho, sporty or urban chic. The more you incorporate into your senior photo session, the better variety you’ll have in your final gallery!
9) Powder (with a compact mirror) and gloss for touch ups.
10) Your cheerleading or band uniform, sports jersey, letterman jacket or any other outfit that reflects your hobbies and activities.

There you are! The most important of the essentials you’ll need to rock your senior shoot!

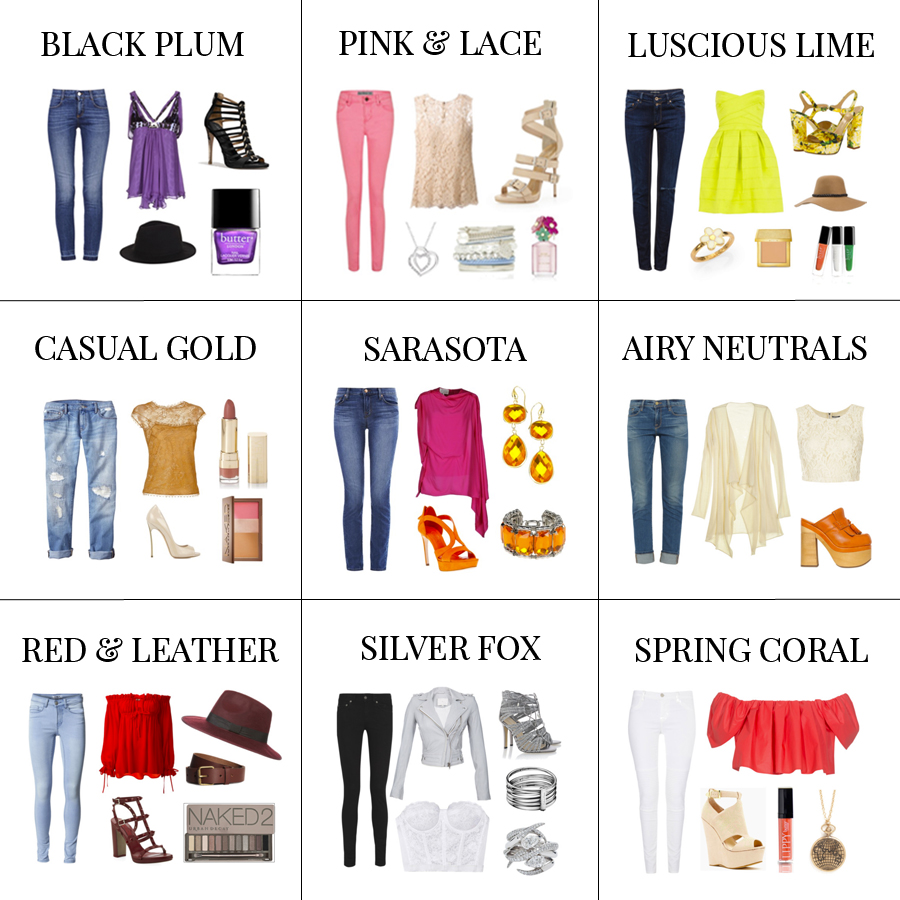
Style Guide: Woodlands Senior Photography – Glam Up Your Favourite Jeans

Dilemma: you want to wear your favourite “I look awesome in these jeans” jeans, but still want to look trendy and a little glamorous. Here’s a few ideas for your spring and summer senior session, on how to include your best jeans with a variety of palettes for a fashionable take on your favourite denims.

Check out the entire Collection, and more of my sets, on my fashion inspiration gallery here: FASHION INSPIRATION FOR YOUR SENIOR PORTRAITS

WHAT-TO-WEAR-SENIOR-PORTRAITS-SPRING

Cropping and Sizing Images ~ Why In Person Ordering Sessions are Important

As a photographer, nothing gives me greater joy than showing my clients the images from our family and senior sessions, wonderful outdoor family portraits that I want you to love and cherish for a lifetime! I present your gallery images to you in person for ordering, so you can see them on a full screen and touch and look over the prints and products when deciding which package is right for you. I will also help guide you when ordering gift prints, wall art and canvases because the ratio matters for the most flattering presentation.

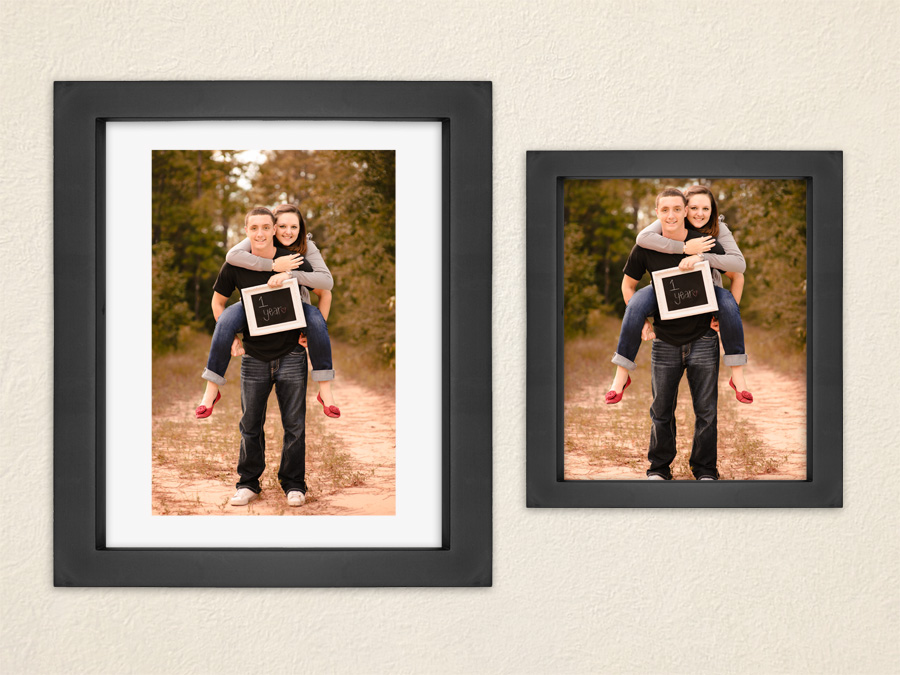
The standard gift print size is usually 8×10, perfect for sitting framed on your desk or in a scrapbook album. However, it is not the same shape as the original 8×12 ratio that the camera produces. Since 8×12 is not the standard, you might be hesitant to order your favourite images in the original ratio.  Let me show you why it’s sometimes better to retain the original composition and ratio in which the image was shot and compare to the cropped version.

On the left is the original image with the 8×12 ratio, within an 11×14 frame and matted, with an 8×12 opening.  As intended, this young couple is framed perfectly, with some ground below them to stand on and the beautiful fall colours of the trees in the background. It’s just as common to find 11×14 frames in stores as it is to find 8x10s!

On the right is the 8×10 crop, within an 8×10 frame. Due to the way the 8×10 ratio crops into the image, they have lost their feet! And the beautiful background trees and sky are almost gone, losing that environmental feel.

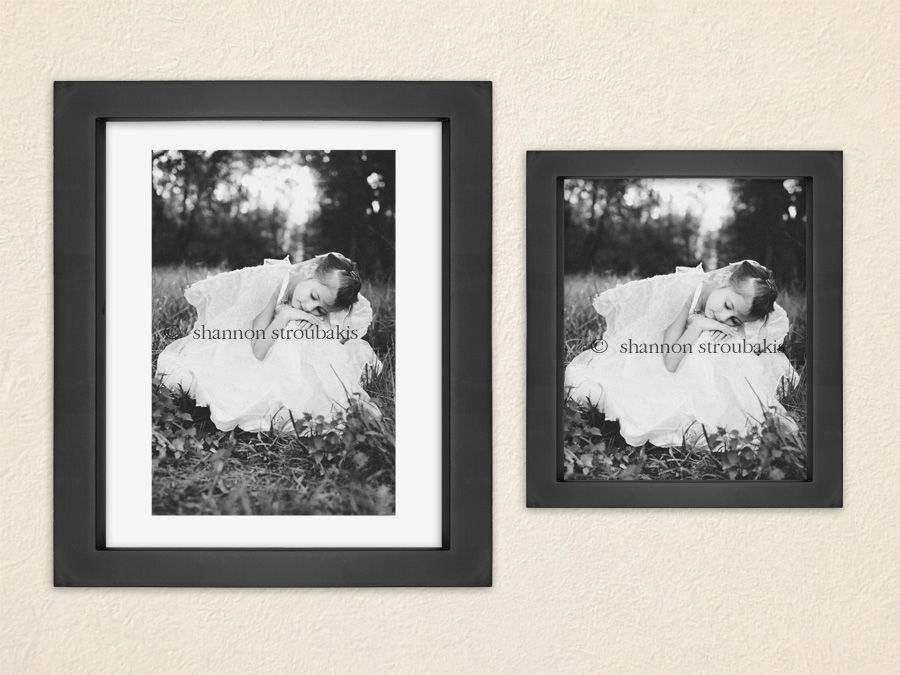
Another example shows how this pretty little fairy shot changes when the 8×10 crop closes the frame in around her.  In the 8×12 ratio on the left,  she’s lost in her own little world, in the forest. On the right,  cropping in closer lets us focus on her but eliminates some of the environment. In this case, it’s a personal preference which crop ratio you may prefer for the final print.

Just one more reason why I am happy to do in person viewing and ordering sessions with my clients! My goal is to make absolutely certain you are happy with your final images and order the right size and shape for your prints, so your family looks their absolute best!

Thank you very much to Katie Belmont at Katie Belmont Photography in Omaha, NE for providing the template for this comparison. Please follow this link to view her wonderful work at her website, and follow along here to Facebook  and “like” her page!

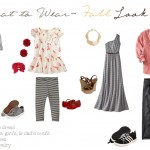
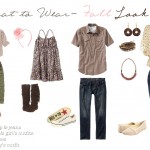
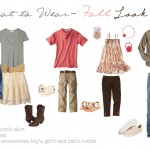
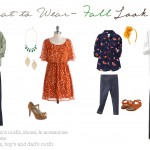
Your Fall Wardrobe – The Woodlands On Location Photographer

As a natural light photographer, shooting outdoors on location, it’s important to help my clients choose their wardrobe for their session so that matches well with the environment and shows them to their very best!

Here are a few ideas for your upcoming family and senior session, and don’t forget to check out Shannon Stroubakis Photography on Pinterest for more inspiration!

Understanding Full Resolution and Web Size Images

Now that you have your digital images you’re excited to print them or share them online!

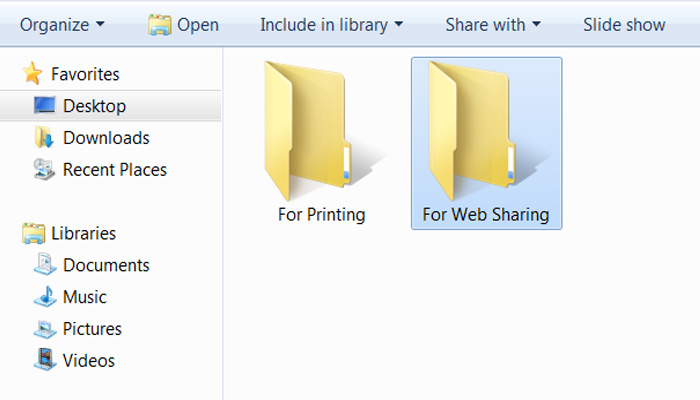
If your images were presented to you in digital format (ie. not prints), likely you’ve had them burned onto a CD or DVD.  You probably have two versions, and it’s important to understand the differences between the two. There might be two folders of images, one labeled “Full Resolution” or “For Printing”, and one labeled “Web Sized” or “For Web Sharing”.


What the print size and web sharing size folders look like.


FULL RESOLUTION VERSIONS FOR PRINTING

Resolution is a much more complex topic that I can cover here, but the crux here is pixels. There is more “information” (the pixels will number in the thousands).  The more pixels, the better they will print.

Crop carefully. Your photographer has taken great care to ensure your images look their best for printing, and cropping can result in loss of resolution.  If you have any concerns about the image, they will guide you on which size (5×7, 8×12 etc) is optimal for your print. Photographers retain the copyright to their artwork, and modification  is illegal so do not re-edit or modify the image.

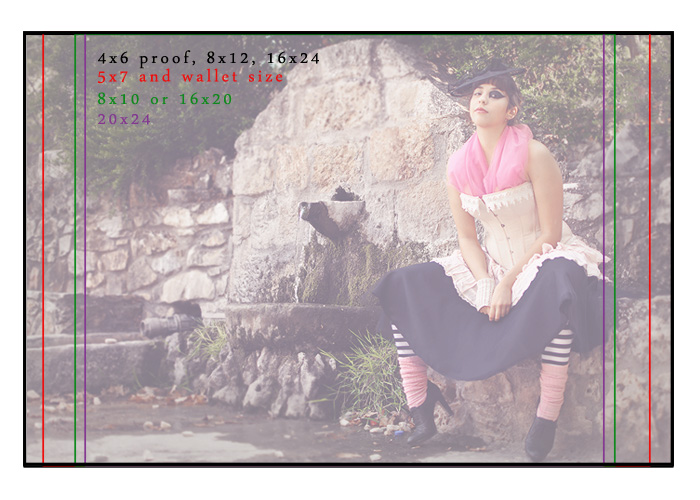
Here is an example of crop sizes. You can see you lose a bit off the sides and the shape changes. Make sure you don’t lose important elements from a poor crop choice.
(Thank you to Chandra Vanderboom from Chandra Vanderboom Photography for creating the crop ratio document used in this illustration. Please follow this link to Chandra’s website to see her amazing work!).

How an image will look cropped to various sizes and ratios.

Another note: PPI, or pixel per inch. Most labs require your files be set to 240 or 300 PPI, so be sure to check with your printer if you are going to sharpen your images. Your photographer has more than likely prepared your images as 240 or 300 PPI. By and large, the PPI doesn’t matter when it comes to viewing the images on your computer.

WEB SIZED VERSIONS FOR SHARING

The web versions I provide for my clients have been resized from thousands of pixels down to 700 pixels on the longest size.  You’ll notice the drastic reduction in pixels, which means that these versions will not print well. If you print them, they will be pixelated, blurry and very poor quality. Not exactly great for framing! The size change means some “web sharpening” is necessary, so if you print these versions the contrast will be heavy and they will look over sharpened.

These are great images for sharing because they are so small. They won’t take up a lot of space and upload quickly. If you upload the larger full resolution files it can overload servers, make for looooong upload time, and because they haven’t been optimized for web viewing will look a little out of focus and lack clarity.

WATERMARKS/COPYRIGHT

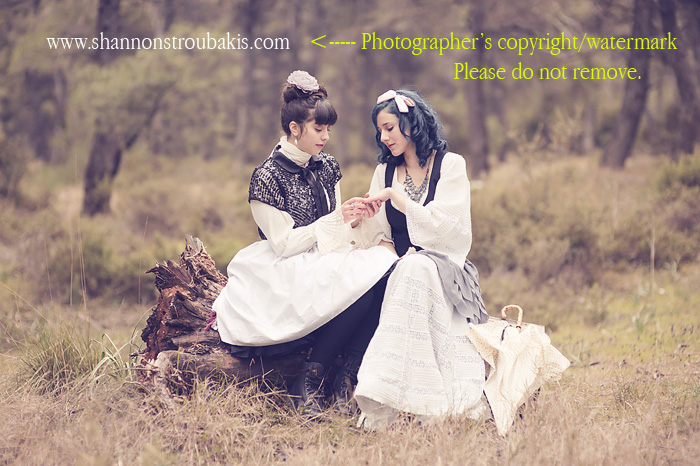
An image that shows a photographers watermark.

Finally, these web sized versions will most likely carry the watermark of your photographer. Please, please do not crop, blur or in any way try to remove this watermark. Your photographer has worked hard to provide you with your beautiful pictures, and retains the copyright for them. Photographers want you to share them with your loved ones, but they deserve credit for creating those wonderful pictures that you are so excited to share. I ask that you respect the work and give credit. Not just because it’s illegal not to do so, but because you appreciate the hard work and long hours put into making them.

I hope that clears up some confusion about the two versions of the images you have been provided! Photographers truly want you to love, cherish, and share the wonderful pictures of you and your family and we want you to be able to enjoy them in the best possible way!

Happy printing and web sharing!

How to Make a Storyboard in Photoshop ~ A Tutorial

I have a lot of fun making storyboards for my blog, so I thought I’d write up a tutorial to share! These are a great way to share your images in a fun way, and lend context to tell the story behind the photographs!

TIP: Storyboards look more pleasing when the images are all edited in a similar style — so try not to mix black and whites with colour images, or bright and sassy with muted vintage. Colour harmony is your friend!

Here is the Photoshop edition I used (Creative Suite 4).
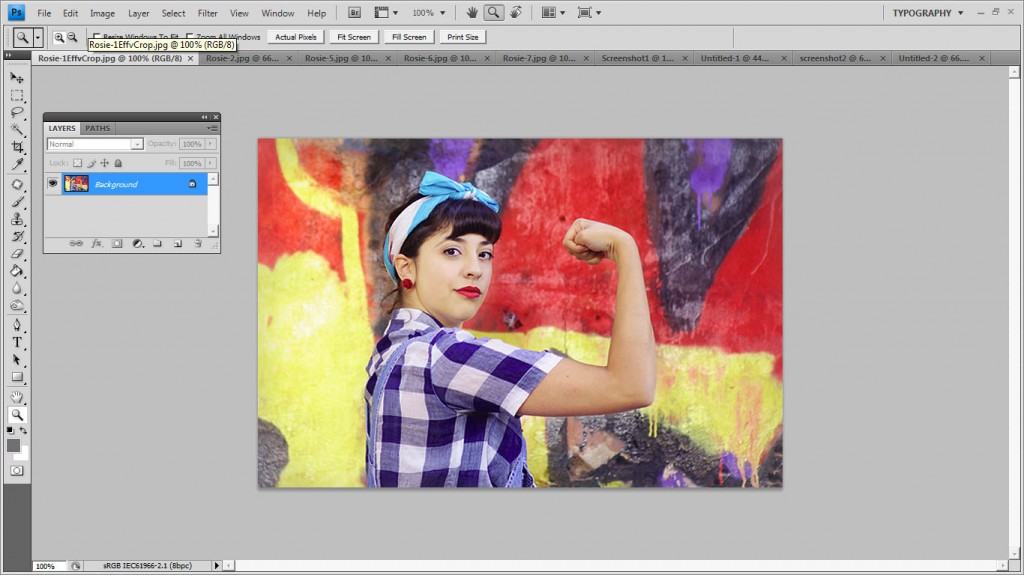
guide on how to create a storyboard

Now to create a new document. In the top menu, go to FILE >> NEW  and plug in the size you want your document. The larger you make your document, the more images you can fit into it, and the larger you can make those images. I have 5 images here, and I want them fairly large (I like to go big!) so mine will be 16×20 inches. These are just for the internet, so I’ll just set resolution to 72 ppi. You can also choose to make your document a specific size, such as the width of your website or blog. I like to use inches, and then resize for blog afterwards.


Now to start making shapes or squares in which to place your images. In the top menu, select New >> Layer. You can use any shape you want, with the tools. I usually just do squares, because I like the uniformity, so I use the rectangular marquee tool. You can leave a small width of white around the edges  to act as a frame if you like (which you can then change the colour of with the paint bucket tool!)
You can hit “U” to bring up the shapes palette, and choose a new shape, like star or oval, or rounded rectangle if you want more creative shapes.
After the shape is created, use the paint bucket tool to colour your shape (any colour will do).
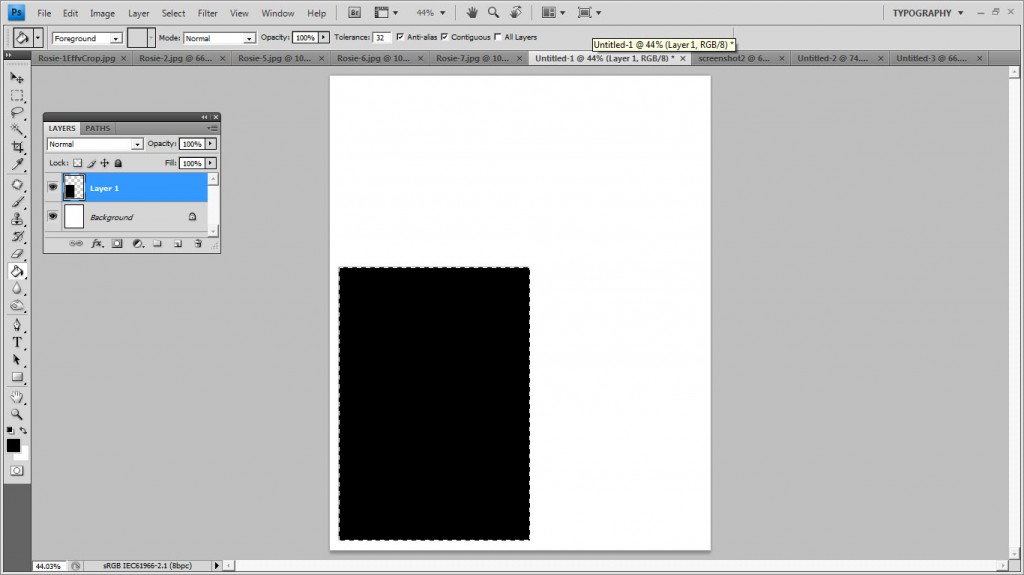
Now you can continue to make shapes, as many as you wish as will fit onto your document. Simply select New >> Layer and use any tool to create your shape, and fill in the shape with your solid colour. Be playful and creative! They don’t have to line up exactly. Mix squares with rectangles, four squares in the corners with a star in the middle, whatever look you are going for!

Here is my finished document, with my five shapes. As you can see in the Layers palette on the left side, each of my shapes are located on their own layer. You can name these layers if you want, or even group them into “Top Images” and “Bottom Images”, however you want to organize them. This is helpful for when you want to reuse the PSD template again for future storyboards.
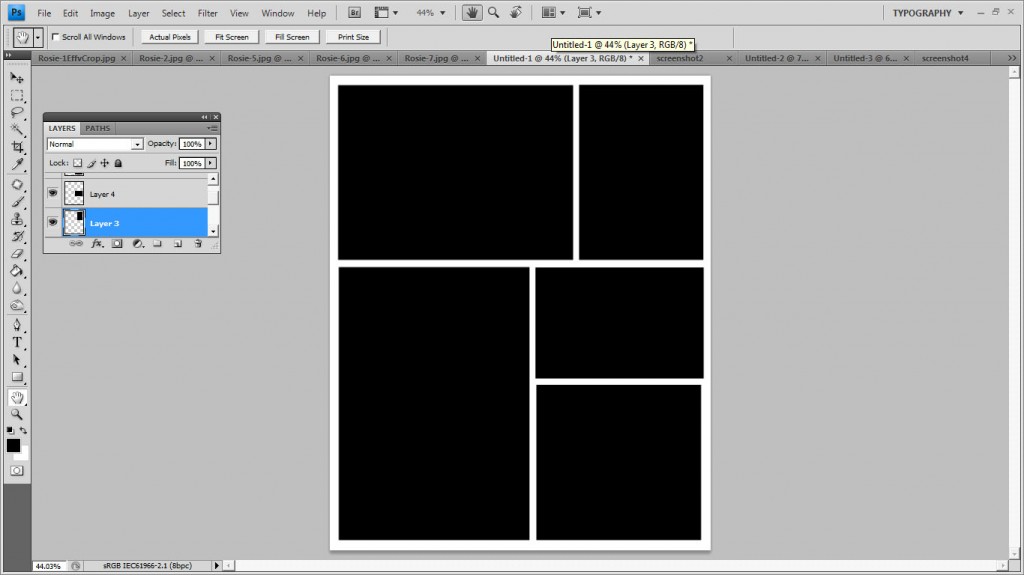
TIP: If your shapes are not sitting exactly as you want them to (not lined up right, not enough space left around the edges, etc) don’t worry! Fill them in, then use the Move tool to shuffle them around a bit. Hit CNTL + T to transform them to fit a little better, pushing or pulling them from the corners to make them bigger or smaller, from the edges to make them fatter or taller. You can also make use of the grids, to make sure the shapes are lined up along the sides.

Now to put your images into the “holes”!

On your document, highlight the Layer you will be pasting it onto and choose FILE from the top menu, and PLACE. This takes you to your computer folders, so you can choose which image to insert.  Your image will pop up, probably in the middle of the document. Don’t worry! We still have to make it fit.
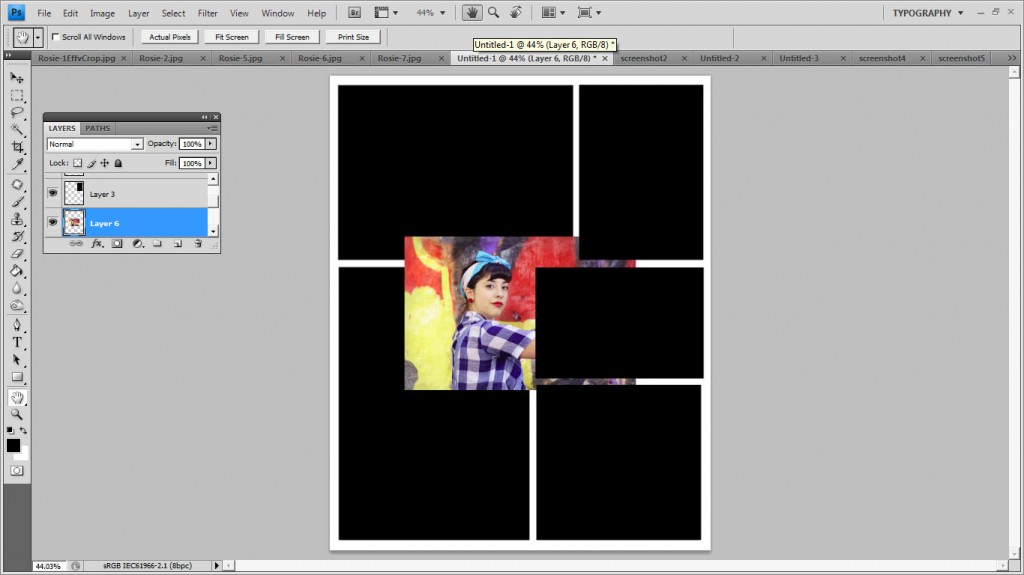
To make the image fit nicely into the slot, hit CNTL + T to transform it. Move it on top of the shape, and *** VERY IMPORTANT *** hold down the shift key while pulling and pushing from the corners only. This will prevent warping. You can move it around from the middle to make it sit better, but if you are enlarging or resizing it down, always use the shift key while adjusting the corners. Allow it to go over the frame of the shape just a bit, to make sure none of the black background will be visible. Then hit the green checkmark above.  And also, very importantly, go into the Layers palette and hit the drop down menu on the top right side and choose “Create Clipping Mask”  This will make your image drop right in, neatly!

TIP: you can create a slot for the images in advance, complete with clipping masks if you choose. Choose a layer, and hit CNTL + SHIFT + N to create a new layer. Name it “Insert Image Here” or “Top Left Image”, whatever you wish,  and choose “Create Clipping Mask”.  Now you have a ready made slot for Placing images, already clipped to the window below.  Follow the same CNTL + T instructions above to size it. This saves you some clicking the next time you use the template!

Now go select each of your images, and repeat the process! Make sure to paste your image onto the right layer. I don’t worry too much about a bit of elbow chop if you have to do so in order to make them fit into the slot.  My finished storyboard now looks like this:
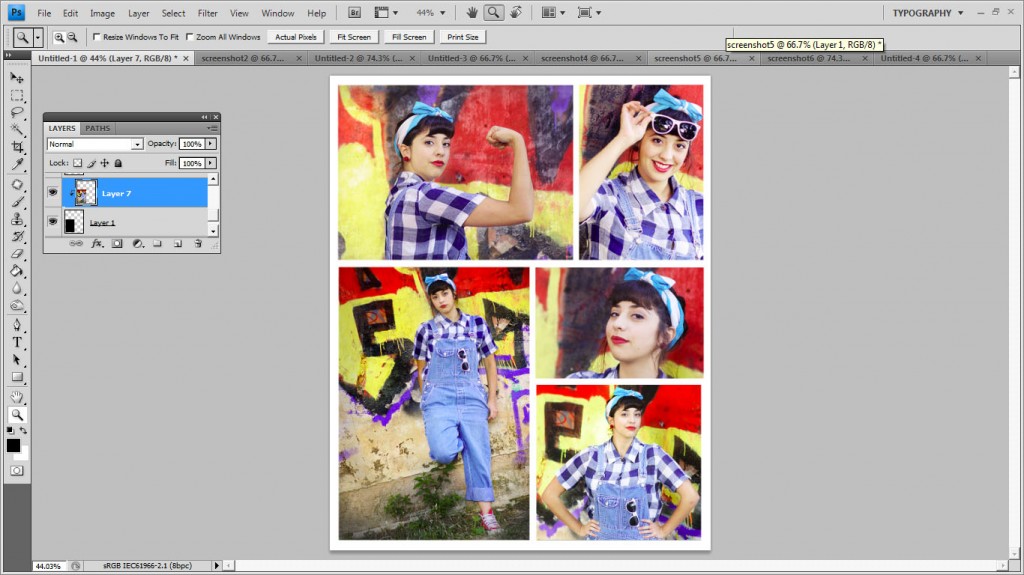
TIP: Your storyboard will look and flow more nicely if you “compose” the storyboard. Have it read in such a way that keeps the viewer interested and that also makes sense. For example, if the subject is facing right, put the image on the left, and vice versa. This will “bookend” the board, and prevent it from looking like your subject is looking out of the board.

Now to save it! Save as a PSD if you want to use the storyboard again. Flatten and save if you want to keep it as a full size JPEG. I always save 2 copies, one full resolution JPEG and one for the blog. Because I use images that have not yet been sharpened, I flatten the storyboard, then run my own resize/sharpen/watermark action, which also changes the profile to sRGB if the images I’m using are files that I’ve just exported from LR into PS as ProPhoto 16 bit files.

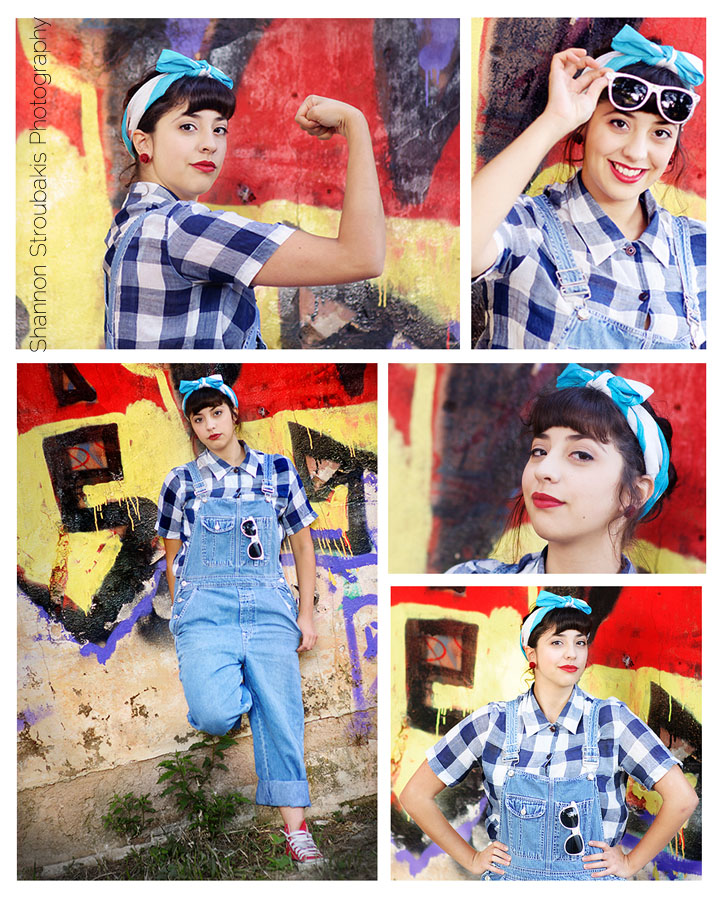
And here it is! My final storyboard, ready for blogging!
If you prefer, you can also use the paint bucket to fill in some of the shapes with a new colour instead of an image, and use the TEXT tool to add a poem, the name of the subject, the date, etc.