Product Showcase ~ The Woodlands Photographer

I love it when products and wall art arrive for clients! Digital images are wonderful for sharing with friends online, but nothing beats having something beautiful in your hands, a tangible product to show off. These adorable 3×3 inch mini accordion albums are perfectly portable and make great gifts.

albums for high school seniors in the woodlands


I’m available for Senior Portraits for the class of 2014. Email shannon@shannonstroubakis.com, call 832-663-5128 or use the contact form HERE to inquire.

CLICK to view all sessions posted in SENIORS and join me on Facebook HERE


Miss G ~ The Woodlands Senior Photography

I had a great time with Miss G at her senior photoshoot! Three outfits, for three totally different looks, and with her gorgeous  colouring the weather was just perfect to catch the sun in her hair and light in her eyes.   I adore simple serene black and white images, and her calm and laid back style made for some beautiful and slightly moody monochrome shots. We got a lot of variety from this senior photo session!

senior photography session in the woodlands

natural and artistic senior photography session in the woodlands in the park

senior headshots in the park for high school senior photography sessions in the woodlands

outdoor senior portrait session in the park in the woodlands for high school senior

I’m available for Senior Portraits! Email shannon@shannonstroubakis.com or use the contact form HERE to inquire.

CLICK to view all sessions posted in SENIORS and join me on Facebook HERE


Headshot Session with Local Author ~ Portrait Photographer in the Woodlands

This local author contacted me for updated headshots months ago, and the weather has finally cooperated with us to go outdoors on location to do her photoshoot. We were looking for several different angles to get a variety to choose from for promotional images for her new book coming out this week. I like to use natural light and soft flattering lighting to bring out the beauty in my clients, and we found a few little pockets of nice light in her home garden.

Are you looking for business headshots? I shoot outdoors for environmental portraits in natural light for a friendly and organic feel to your business headshots. Click here to view my portfolio.

corporate and business headshots for local artists and businesses in the woodlands

Congratulations Barbara on the release of your latest work, and I wish you much success!

Holiday Family Portraits ~ The Woodlands Family Photographer

Our beautiful weather continued into the holiday season, making for some pretty golden light for outdoor on location family portrait sessions here in the Woodlands. I photographed this beautiful family on a bright and cheerful Sunday. Lovely family and they even brought their fluffy and friendly dog to join in for some family picture fun!

Cropping and Sizing Images ~ Why In Person Ordering Sessions are Important

As a photographer, nothing gives me greater joy than showing my clients the images from our family and senior sessions, wonderful outdoor family portraits that I want you to love and cherish for a lifetime! I present your gallery images to you in person for ordering, so you can see them on a full screen and touch and look over the prints and products when deciding which package is right for you. I will also help guide you when ordering gift prints, wall art and canvases because the ratio matters for the most flattering presentation.

The standard gift print size is usually 8×10, perfect for sitting framed on your desk or in a scrapbook album. However, it is not the same shape as the original 8×12 ratio that the camera produces. Since 8×12 is not the standard, you might be hesitant to order your favourite images in the original ratio.  Let me show you why it’s sometimes better to retain the original composition and ratio in which the image was shot and compare to the cropped version.

On the left is the original image with the 8×12 ratio, within an 11×14 frame and matted, with an 8×12 opening.  As intended, this young couple is framed perfectly, with some ground below them to stand on and the beautiful fall colours of the trees in the background. It’s just as common to find 11×14 frames in stores as it is to find 8x10s!

On the right is the 8×10 crop, within an 8×10 frame. Due to the way the 8×10 ratio crops into the image, they have lost their feet! And the beautiful background trees and sky are almost gone, losing that environmental feel.

Another example shows how this pretty little fairy shot changes when the 8×10 crop closes the frame in around her.  In the 8×12 ratio on the left,  she’s lost in her own little world, in the forest. On the right,  cropping in closer lets us focus on her but eliminates some of the environment. In this case, it’s a personal preference which crop ratio you may prefer for the final print.

Just one more reason why I am happy to do in person viewing and ordering sessions with my clients! My goal is to make absolutely certain you are happy with your final images and order the right size and shape for your prints, so your family looks their absolute best!

Thank you very much to Katie Belmont at Katie Belmont Photography in Omaha, NE for providing the template for this comparison. Please follow this link to view her wonderful work at her website, and follow along here to Facebook  and “like” her page!

Your Fall Wardrobe – The Woodlands On Location Photographer

As a natural light photographer, shooting outdoors on location, it’s important to help my clients choose their wardrobe for their session so that matches well with the environment and shows them to their very best!

Here are a few ideas for your upcoming family and senior session, and don’t forget to check out Shannon Stroubakis Photography on Pinterest for more inspiration!

One Year Anniversary ~ The Woodlands Portrait Photographer

I had the honour of helping this young couple celebrate one year together! They chose two locations, a field and a small forested area with a pathway, for some fun outdoor on location portraits! And they even came with their own little prop – a cute sign that Miss S made herself!

Thank you for letting me capture images of you on such a special occasion! Love is a beautiful thing!

CoupleSession 1


Choose Your Location with Shannon Stroubakis, The Woodlands TX Outdoor Photographer

Looking for a family portrait, engagement, maternity or senior session? There are plenty of great locations around the Spring, TX and The Woodlands, TX where we can meet outdoors on location! Each  Full Session and Simplicity Session with me also includes a Pre Session Consultation, and we’ll go over the perfect place that’s convenient for you and that reflects you and your family!  A lovely flower field?  An urban location? How about near the park and canals?

woodlands photography locations for family photos

the woodlands engagement photographer

Senior Fashion 5

Sondra Sneed ~ Writer/Author ~ Shannon Stroubakis, The Woodlands TX Personal Portfolio Photographer

This month I met the talented and inspirational Sondra Sneed, a local writer and author here in The Woodlands, Texas, for unique and personalized headshots. She inquired with me for images for her website, with a specific vision in mind. We met last weekend, on a gorgeous golden late afternoon at my favourite grassy knoll, and shot these beautiful images of her in the field. With the sun rays raining down behind her, she’s illuminated with beautiful light, a perfect ethereal glow that matches the aura of her inspired writing. You can read her story and follow her upcoming work at www.sondrasneed.com.

Unique corporate headshot on location outdoors with a local author and writer for a website design

Understanding Full Resolution and Web Size Images

Now that you have your digital images you’re excited to print them or share them online!

If your images were presented to you in digital format (ie. not prints), likely you’ve had them burned onto a CD or DVD.  You probably have two versions, and it’s important to understand the differences between the two. There might be two folders of images, one labeled “Full Resolution” or “For Printing”, and one labeled “Web Sized” or “For Web Sharing”.


What the print size and web sharing size folders look like.


FULL RESOLUTION VERSIONS FOR PRINTING

Resolution is a much more complex topic that I can cover here, but the crux here is pixels. There is more “information” (the pixels will number in the thousands).  The more pixels, the better they will print.

Crop carefully. Your photographer has taken great care to ensure your images look their best for printing, and cropping can result in loss of resolution.  If you have any concerns about the image, they will guide you on which size (5×7, 8×12 etc) is optimal for your print. Photographers retain the copyright to their artwork, and modification  is illegal so do not re-edit or modify the image.

Here is an example of crop sizes. You can see you lose a bit off the sides and the shape changes. Make sure you don’t lose important elements from a poor crop choice.
(Thank you to Chandra Vanderboom from Chandra Vanderboom Photography for creating the crop ratio document used in this illustration. Please follow this link to Chandra’s website to see her amazing work!).

How an image will look cropped to various sizes and ratios.

Another note: PPI, or pixel per inch. Most labs require your files be set to 240 or 300 PPI, so be sure to check with your printer if you are going to sharpen your images. Your photographer has more than likely prepared your images as 240 or 300 PPI. By and large, the PPI doesn’t matter when it comes to viewing the images on your computer.

WEB SIZED VERSIONS FOR SHARING

The web versions I provide for my clients have been resized from thousands of pixels down to 700 pixels on the longest size.  You’ll notice the drastic reduction in pixels, which means that these versions will not print well. If you print them, they will be pixelated, blurry and very poor quality. Not exactly great for framing! The size change means some “web sharpening” is necessary, so if you print these versions the contrast will be heavy and they will look over sharpened.

These are great images for sharing because they are so small. They won’t take up a lot of space and upload quickly. If you upload the larger full resolution files it can overload servers, make for looooong upload time, and because they haven’t been optimized for web viewing will look a little out of focus and lack clarity.

WATERMARKS/COPYRIGHT

An image that shows a photographers watermark.

Finally, these web sized versions will most likely carry the watermark of your photographer. Please, please do not crop, blur or in any way try to remove this watermark. Your photographer has worked hard to provide you with your beautiful pictures, and retains the copyright for them. Photographers want you to share them with your loved ones, but they deserve credit for creating those wonderful pictures that you are so excited to share. I ask that you respect the work and give credit. Not just because it’s illegal not to do so, but because you appreciate the hard work and long hours put into making them.

I hope that clears up some confusion about the two versions of the images you have been provided! Photographers truly want you to love, cherish, and share the wonderful pictures of you and your family and we want you to be able to enjoy them in the best possible way!

Happy printing and web sharing!

Remember the Details ~ Spring, TX and the Woodlands TX Family Photographer

When it comes time to do your family portraits, it’s important to remember the details. Time passes quickly, and it’s easy to forget how tiny a child’s hand once was. Or the delicate sweep of eyelashes brushing across a cheek. Little toes grow into Daddy’s big shoes all too quickly. And one day you’ll cherish the simple but moving image of your mother holding your daughter’s hand, as a testament to a love that crosses generations.

A black and white image of a grandmother holding her granddaughter's hand

Grandchildren are the dots that connect the lines from generation to generation.
~Lois Wyse

Spring, TX and The Woodlands, TX ~ Event Photographer

This past September, I had the amazing opportunity to cover a four day long corporate event for the American Bureau of Shipping, Nautical Systems, at the Woodlands Marriott Hotel.

This was a very positive experience for me, personally and professionally, and several of the images I shot were used in a feature article about the conference for the online edition of The Maritime Executive magazine. The article can be found here.

I find event photography to be not just technically challenging, but an opportunity to be creative and utilize lenses I don’t always use for portraiture, like wide angles. I had to be fast for some elements but then for others I had several days to think about the types of shots I wanted to capture. Altogether a very different kind of photographic challenge, and I look forward to shooting more events in the future!

So follow these links to see images from the ABS Nautical Systems September 2011 conference.

Event photography in the Woodlands opening ceremony speeches

ABS  Nautical Systems Conference – Opening Ceremony and General Session

Event photography in the Woodlands TX sessions and slide shows

ABS Nautical Systems Conference – Sessions and Groups

Corporate conference and event photography image of vendors and corporate seminars in the Woodlands TX

ABS Nautical Systems Conference – Vendors

Barefoot and Dreaming ~The Woodlands TX, Children’s Photographer

I had a wonderful outdoor photography session with Miss B recently, at my favourite location here in Spring, TX. Children’s portraiture is a lot of fun for me, especially with girls this age outside, because of the natural unplanned poses you get from them and the spontaneous smiles and laughter! I had a great time with her and her mama, and look forward to their family portraits for the holiday season in the fall!

Outdoor colour pictures of a little girl in a sundress

close up image of a little girl smiling outside with warm autumn colours

photo of a little girl with long hair in a sundress outside by a lake with a bouquet of flowers

little girl with long curly hair and skirt twirling on a dirt path at sunset

 A slow dance along the path of dreams.
Careless, a whisperling caught in the breeze.


How to Make a Storyboard in Photoshop ~ A Tutorial

I have a lot of fun making storyboards for my blog, so I thought I’d write up a tutorial to share! These are a great way to share your images in a fun way, and lend context to tell the story behind the photographs!

TIP: Storyboards look more pleasing when the images are all edited in a similar style — so try not to mix black and whites with colour images, or bright and sassy with muted vintage. Colour harmony is your friend!

Here is the Photoshop edition I used (Creative Suite 4).

guide on how to create a storyboard

Now to create a new document. In the top menu, go to FILE >> NEW  and plug in the size you want your document. The larger you make your document, the more images you can fit into it, and the larger you can make those images. I have 5 images here, and I want them fairly large (I like to go big!) so mine will be 16×20 inches. These are just for the internet, so I’ll just set resolution to 72 ppi. You can also choose to make your document a specific size, such as the width of your website or blog. I like to use inches, and then resize for blog afterwards.


Now to start making shapes or squares in which to place your images. In the top menu, select New >> Layer. You can use any shape you want, with the tools. I usually just do squares, because I like the uniformity, so I use the rectangular marquee tool. You can leave a small width of white around the edges  to act as a frame if you like (which you can then change the colour of with the paint bucket tool!)
You can hit “U” to bring up the shapes palette, and choose a new shape, like star or oval, or rounded rectangle if you want more creative shapes.
After the shape is created, use the paint bucket tool to colour your shape (any colour will do).

Now you can continue to make shapes, as many as you wish as will fit onto your document. Simply select New >> Layer and use any tool to create your shape, and fill in the shape with your solid colour. Be playful and creative! They don’t have to line up exactly. Mix squares with rectangles, four squares in the corners with a star in the middle, whatever look you are going for!

Here is my finished document, with my five shapes. As you can see in the Layers palette on the left side, each of my shapes are located on their own layer. You can name these layers if you want, or even group them into “Top Images” and “Bottom Images”, however you want to organize them. This is helpful for when you want to reuse the PSD template again for future storyboards.

TIP: If your shapes are not sitting exactly as you want them to (not lined up right, not enough space left around the edges, etc) don’t worry! Fill them in, then use the Move tool to shuffle them around a bit. Hit CNTL + T to transform them to fit a little better, pushing or pulling them from the corners to make them bigger or smaller, from the edges to make them fatter or taller. You can also make use of the grids, to make sure the shapes are lined up along the sides.

Now to put your images into the “holes”!

On your document, highlight the Layer you will be pasting it onto and choose FILE from the top menu, and PLACE. This takes you to your computer folders, so you can choose which image to insert.  Your image will pop up, probably in the middle of the document. Don’t worry! We still have to make it fit.

To make the image fit nicely into the slot, hit CNTL + T to transform it. Move it on top of the shape, and *** VERY IMPORTANT *** hold down the shift key while pulling and pushing from the corners only. This will prevent warping. You can move it around from the middle to make it sit better, but if you are enlarging or resizing it down, always use the shift key while adjusting the corners. Allow it to go over the frame of the shape just a bit, to make sure none of the black background will be visible. Then hit the green checkmark above.  And also, very importantly, go into the Layers palette and hit the drop down menu on the top right side and choose “Create Clipping Mask”  This will make your image drop right in, neatly!

TIP: you can create a slot for the images in advance, complete with clipping masks if you choose. Choose a layer, and hit CNTL + SHIFT + N to create a new layer. Name it “Insert Image Here” or “Top Left Image”, whatever you wish,  and choose “Create Clipping Mask”.  Now you have a ready made slot for Placing images, already clipped to the window below.  Follow the same CNTL + T instructions above to size it. This saves you some clicking the next time you use the template!

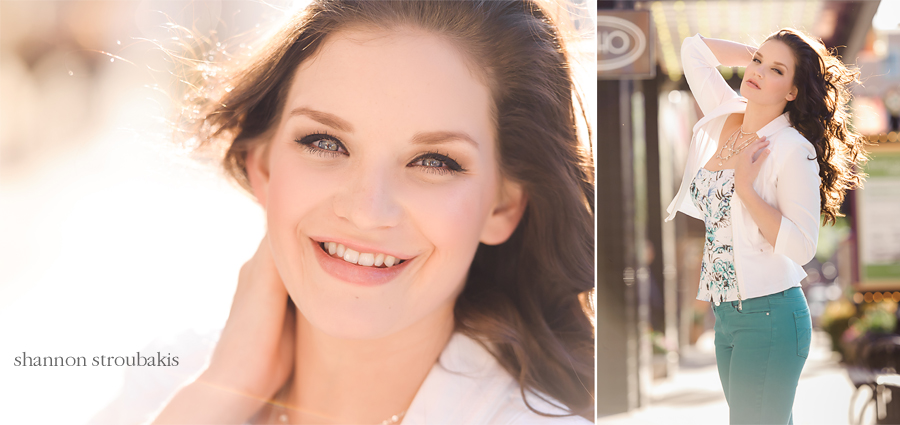
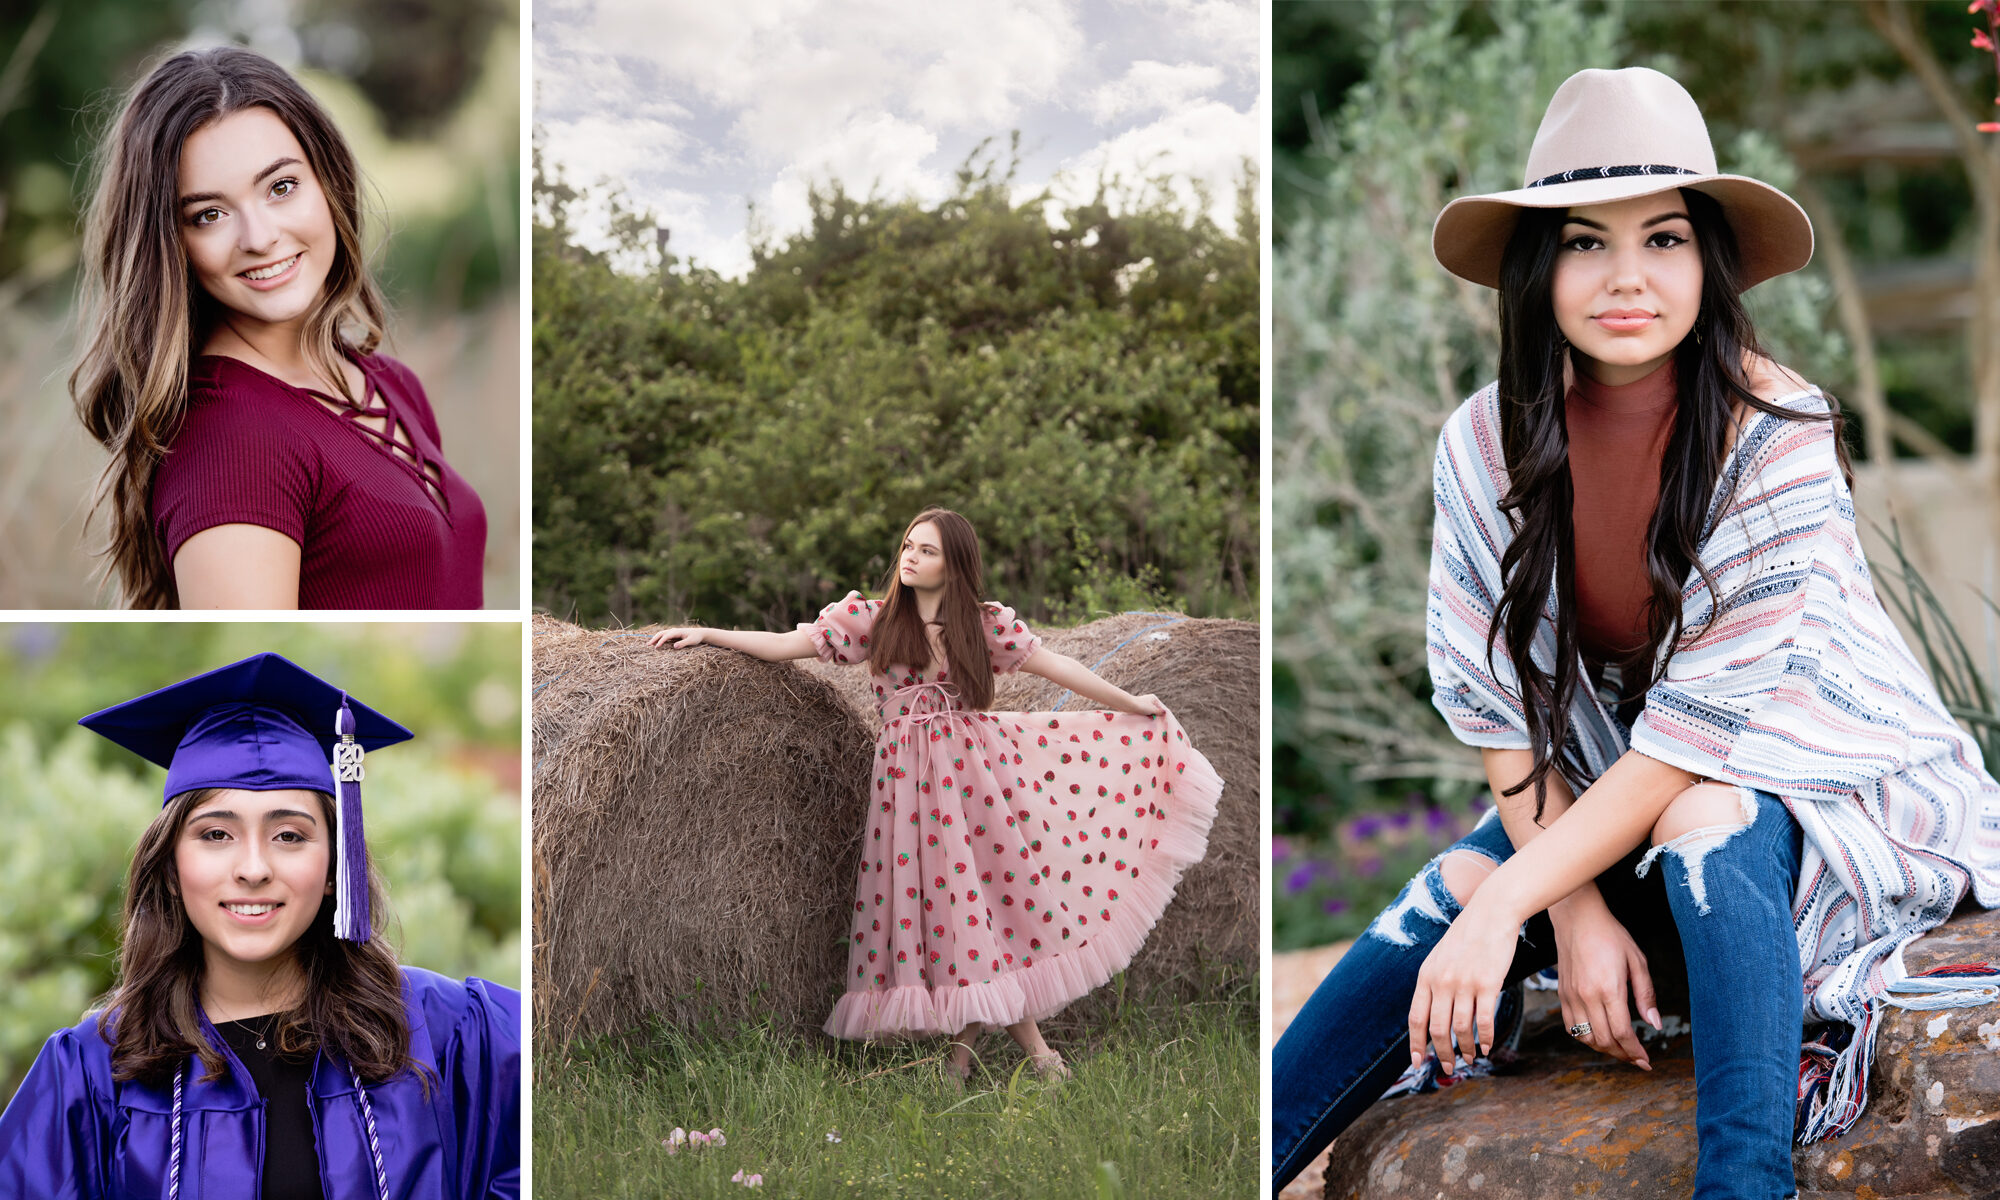
Now go select each of your images, and repeat the process! Make sure to paste your image onto the right layer. I don’t worry too much about a bit of elbow chop if you have to do so in order to make them fit into the slot.  My finished storyboard now looks like this:

TIP: Your storyboard will look and flow more nicely if you “compose” the storyboard. Have it read in such a way that keeps the viewer interested and that also makes sense. For example, if the subject is facing right, put the image on the left, and vice versa. This will “bookend” the board, and prevent it from looking like your subject is looking out of the board.

Now to save it! Save as a PSD if you want to use the storyboard again. Flatten and save if you want to keep it as a full size JPEG. I always save 2 copies, one full resolution JPEG and one for the blog. Because I use images that have not yet been sharpened, I flatten the storyboard, then run my own resize/sharpen/watermark action, which also changes the profile to sRGB if the images I’m using are files that I’ve just exported from LR into PS as ProPhoto 16 bit files.

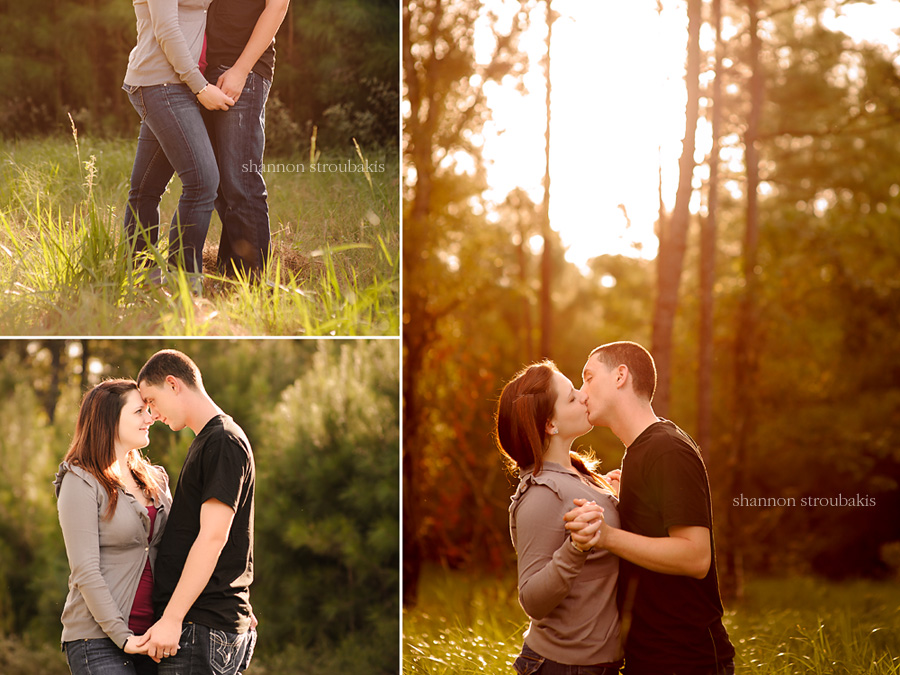
And here it is! My final storyboard, ready for blogging!

If you prefer, you can also use the paint bucket to fill in some of the shapes with a new colour instead of an image, and use the TEXT tool to add a poem, the name of the subject, the date, etc.


Talented Boy ~ Spring, TX and the Woodlands, TX Children’s Photographer

How far is far? How high is high?
We’ll never know, until we try. 

Little boy playing golf in the Woodlands TX in the park

One of the great joys of being a photographer for children is capturing each person’s unique personality. When I heard about this spritely little man and his many talents, I couldn’t wait for our portrait session in the Woodlands.
“A” could be for animated, ambitious, alive and affectionate — all words that describe this six year old piano playing, golf club swinging charmer! Thank you to Ashtin and his family for letting me capture his enthusiasm and his great smile!

Portrait of a little boy in black and white in a dress shirt

Black and white portrait of a young boy in the woodlands tx with golf clubs

Be You ~ Spring, TX and The Woodlands, TX Senior Photographer

Senior photography is an opportunity to be a little more artistic and creative. I love to create works of art for high school seniors and college students, with images tailored to each individual.  You are unique. Your images should be too.

I look to you
not because I have nowhere else to turn
or to escape what lurks behind me in shadows
but because by seeing you
I see me

black and white senior photography on a road in the forest